DIY Home Improvement: How To Use A Grout Cleaning Machine Like A Pro
Have you observed a color change on the lines between your bathroom and kitchen tile flooring? The mini globules left after you rinse your flooring with detergents are possibly the principal culprit. Most soiling on these flooring structures happens when microscopic elements accumulate in the ground joints, creating a breeding environment for mildew and mold. That calls for regular cleaning to maintain a safe home for your family.
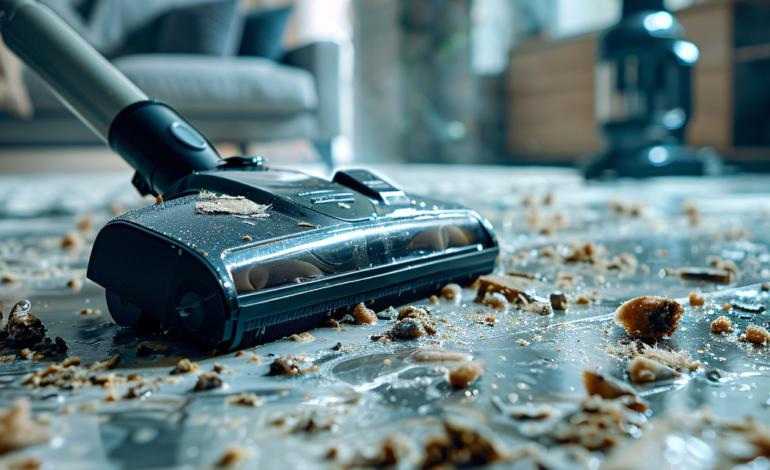
Scraping off grime, grease, and dirt on tile grout is a heavy endeavor that requires a quality investment in labor and time. A grout cleaning machine can minimize cleaning labor and turn dirt floors into lavishly attractive surfaces within minutes. To get the most value from your tile grout cleaning machine, you should leverage the user manual and the following professional tips.
1. Know Your Machine and Work Piece
Many DIYers rarely have extensive knowledge of their cleaning machines and workpieces, which often makes it challenging to complete grout cleaning projects on time. Every top-quality tile grout cleaner has explicit precautions and operational guidelines for maximizing efficiency and user safety. Most manufacturers provide guidelines on detergents and cleaning solutions that are compatible with their grout cleaners. You want to know how and when to use your machine and the surfaces on which it performs best.
Electric and petrol grout cleaners emit gases that could be hazardous when used alongside concentrated cleaning agents. Therefore, open the windows and turn on the fan when cleaning poorly ventilated spaces. Cover the areas, items, and countertops around the tile grout with towels, plastic sheets, or drop cloths to protect them from accidental drops and splashes.
2. Prepare Your Surface
Grout cleaning machines perform seamlessly on lightly soiled or stained surfaces. However, their scrubbing mechanism or brushes can get stuck in severely stained surfaces, mostly where mildew and mold are present. This can damage the machine and affect the cleaning results.
To safeguard your machine and improve cleaning results, you want to pre-treat your tile grouts. Pre-treatment involves applying the cleaner to the grout lines, ensuring full-scale coverage. Ten minutes of the cleaner sitting on the grout will maximize penetration and tear down the grime and stains.
3. Set Your Machine Accordingly
When studying your grout cleaner, you want to explore manufacturer-specific recommendations on solution concentration, brush speed, and water flow rate. These are integral in ensuring your machine can deliver the desired cleaning results within your projected timeframe without detergent overuse. Also, it provides seamless operations to prevent damage to the brushes and achieve more reliable results. Study the manufacturer’s recommendations for the brush speed and water flow rate in relevance to the grout type and its condition.
4. Put Your Machine to Work
Having readied the workpiece, power your machine and guide it along the grout lines. Apply gentle pressure and move the machine steadily over the areas of interest. Put more emphasis on areas with stubborn stains and dirt elements. Leverage the machine’s scrubbing action and brushes to loosen the deposits and ease their removal. Rinse chemical cleaners and bleach with clean water to remove residues. You want to wipe the excess cleaner with a sponge or damp cloth.
5. Work Piece Inspection and Re-Touch
When working on heavily soiled tile grout surfaces, you might have to repeat the process to attain maximum cleanliness. Inspect your workpiece after systematic cleaning to ensure no residues or stains. Spaces with residues and stains might require spot-cleaning to achieve near-immaculate cleanliness.
Let your grout lines dry, after which you can apply the grout sealer if necessary. Sealing the grout lines is integral to safeguarding them from potential stains and streamlining maintenance work.
6. Keep Your Machine in Pristine Condition

Even the most professional janitor and machine operator will avoid cleaning grout with a poorly-conditioned grout cleaner. The machine will fail unexpectedly and could damage the tile flooring when you force the brushes down the grout lines. Delayed cleaning sessions can affect your schedules and leave more work to handle the next day. Also, you will not achieve that stain-free surface you expected from a thorough cleaning session.
Proper tile grout cleaner maintenance and inspections are paramount to ready the machine for potential use cases. Wash your machine thoroughly after use, ensuring you inspect all components for residuals and dirt elements. You want to disassemble the machine to access all components. Identify areas with stains and other elements that would require cleaning.
Schedule professional visits regularly to inspect and repair your machine for underlying and existing faults. Machines that barely receive care and maintenance will soon become nonfunctional. You can avoid channeling another chunk of money into purchasing a new machine a year or several months after the initial investment.
Wrapping Up
Tile grout cleaners simplify the labor-intensive and time-consuming job of removing dirt elements stuck between your grout lines to give your flooring a seamless look. Using a grout cleaner is a mission you want to prepare for, and you need to learn everything about the basics. Start by studying your machine to know if its features support cleaning the type of tile grout you have. You want to inspect your workpiece and conduct a thorough surface preparation before the actual cleaning task. Set the correct settings for the job and ensure you clean your machine after use.